
 Gerardo Marx Chávez-Campos
bd6c7044f8
Gerardo Marx Chávez-Campos
bd6c7044f8
|
3 years ago | |
|---|---|---|
| Imagenes | 4 years ago | |
| README.md | 3 years ago | |
| add-broker.png | 3 years ago | |
| add-tab.png | 3 years ago | |
| deploy.png | 3 years ago | |
| flows.json | 3 years ago | |
| group.png | 3 years ago | |
| mosquitto.conf | 3 years ago | |
| mqtt-node.png | 3 years ago | |
| process.png | 3 years ago | |
| topic.png | 3 years ago | |
| ui.png | 3 years ago | |
README.md
Introduction
This reposity includes the basic information to mount a server using Node-RED as a Dashboard and also working as a MQTT server using Mosquitto. The MQTT server is tested with a ESP32 client to publish random numbers every two seconds.
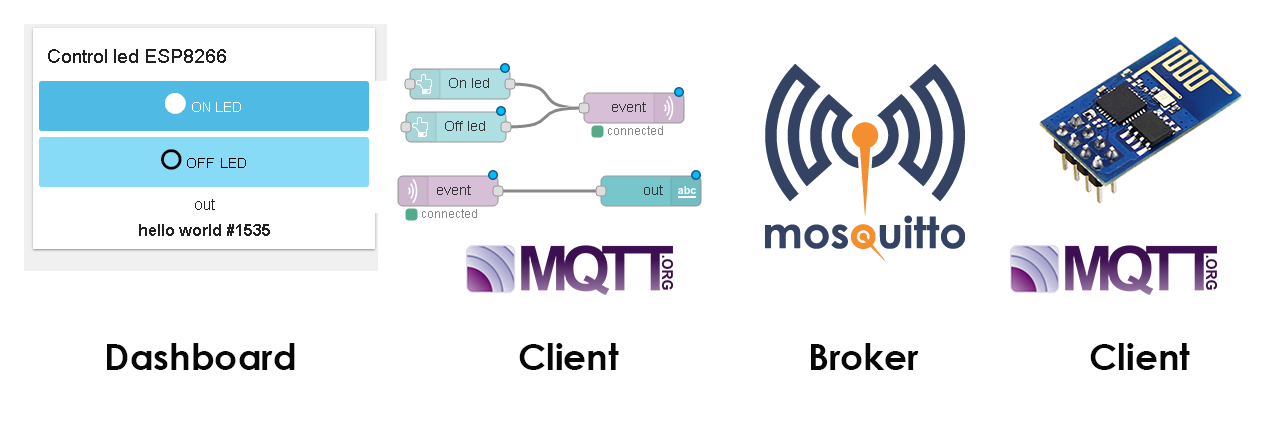
The general scheme is shown below, the complete environment requires a client, mqtt server or broker, and a mqtt client that works like a user interface (dashboard).
The basic communication scheme could work like:
-
The ESP32 starts the communication chain by sending a text message to the broker, the broker can be public or local.
-
Depending on the code, the sending message can be replicated to all the connected clients in the topic.
-
Finally, a web server based on Node-RED will read the publicated data in the broker to be displayed in the UI.
The client code to test the environment is hosted in the mqtt-client-esp32-v2.
Thanks to Andrés Perez for the first version.
MQTT Server
Installing Mosquitto
For the Raspberry pi, based on Debian's distribution, we can use:
sudo apt update
sudo apt upgrade
sudo apt install mosquitto
To execute mosquitto and enable every time the system starts:
sudo systemctl enable mosquitto.service
Configuring the Mosquitto server
First replace the default configuration file by the file providing in this repository:
sudo cp ./mosquitto.conf /etc/mosquitto/mosquitto.conf
then, create the password file instanced on the mosquitto.conf file
sudo touch /etc/mosquitto/passwd
finally, restart the service:
sudo systemctl restart mosquitto
Node-RED installation
To install nodejs write in terminal:
sudo apt update
sudo apt install nodejs
sudo apt install npm
Then, let us install the Node-RED app and the Dashboard complement by using the Node Package Manager:
sudo npm install -g --unsafe-perm node-red
node-red-stop
npm install node-red-dashboard
now, we require to run in background the app and verify that node-RED is running:
node-red &
sudo netstat -plnt
then, to get access to node-RED go to your web browser at rasp-hostname.local:1880 or rasp-ip:18080.
A flow process in Node-RED
A basic process is implemented on Node-RED to test the mqtt protocol. Thus, add the next blocks:
mqtt infrom network groupdebugfrom commontextfrom dashboard
then, double-click on mqtt-in to open and edit the node:
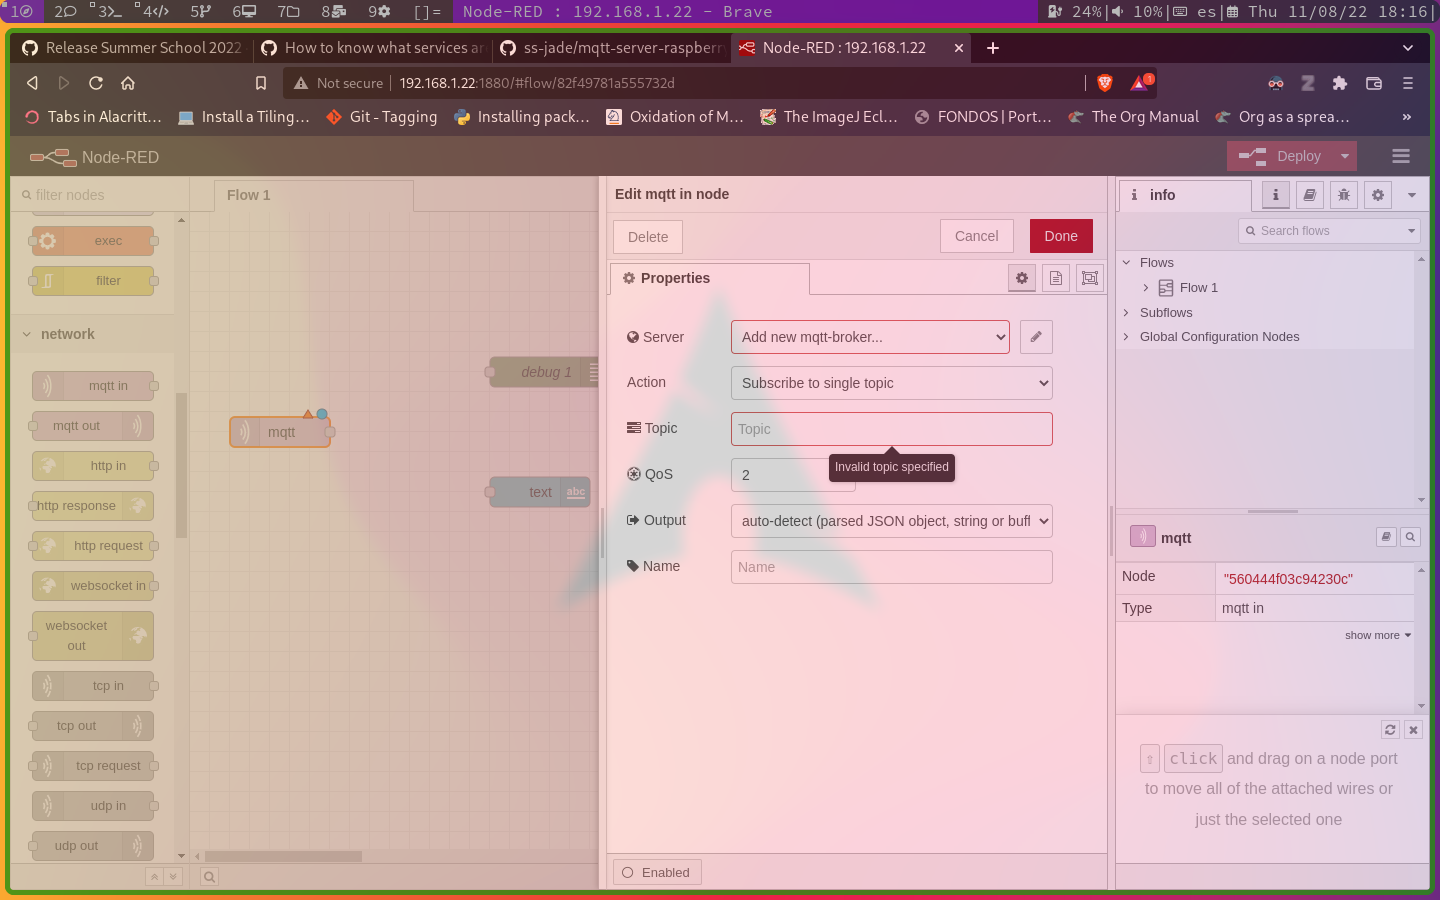
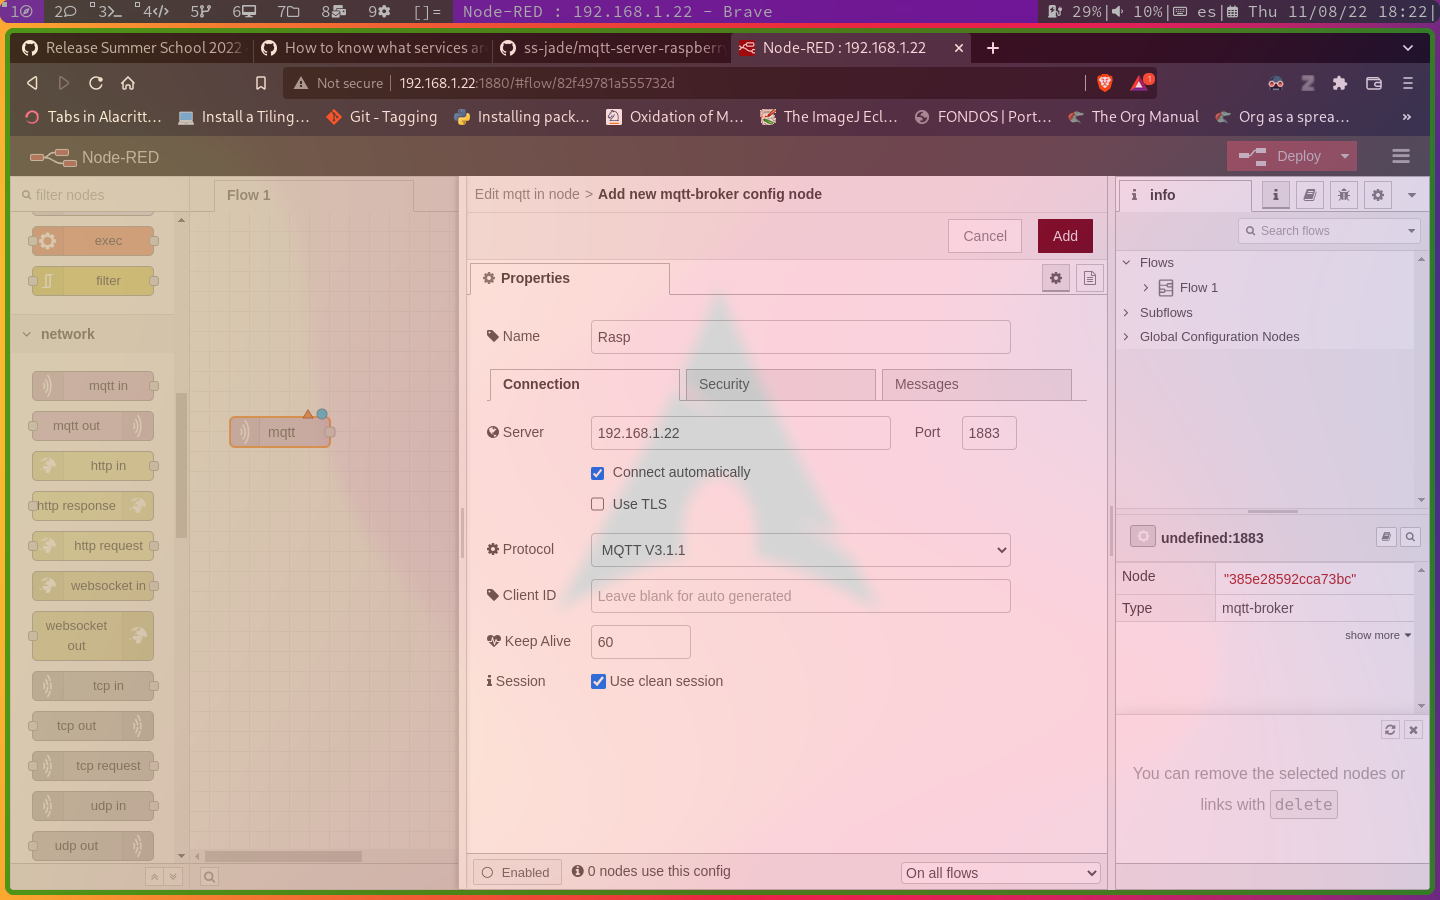
click on Add new mqtt-brocker, then, in the Connection tab: set Name to Rasp, point the server to the raspberry's ip or hostname and port 1883. Leave unchanged the Security and Message tabs and click on the Add button.
Finally, set the topic to data/esp32 and the output to a String in the mqtt properties' node:
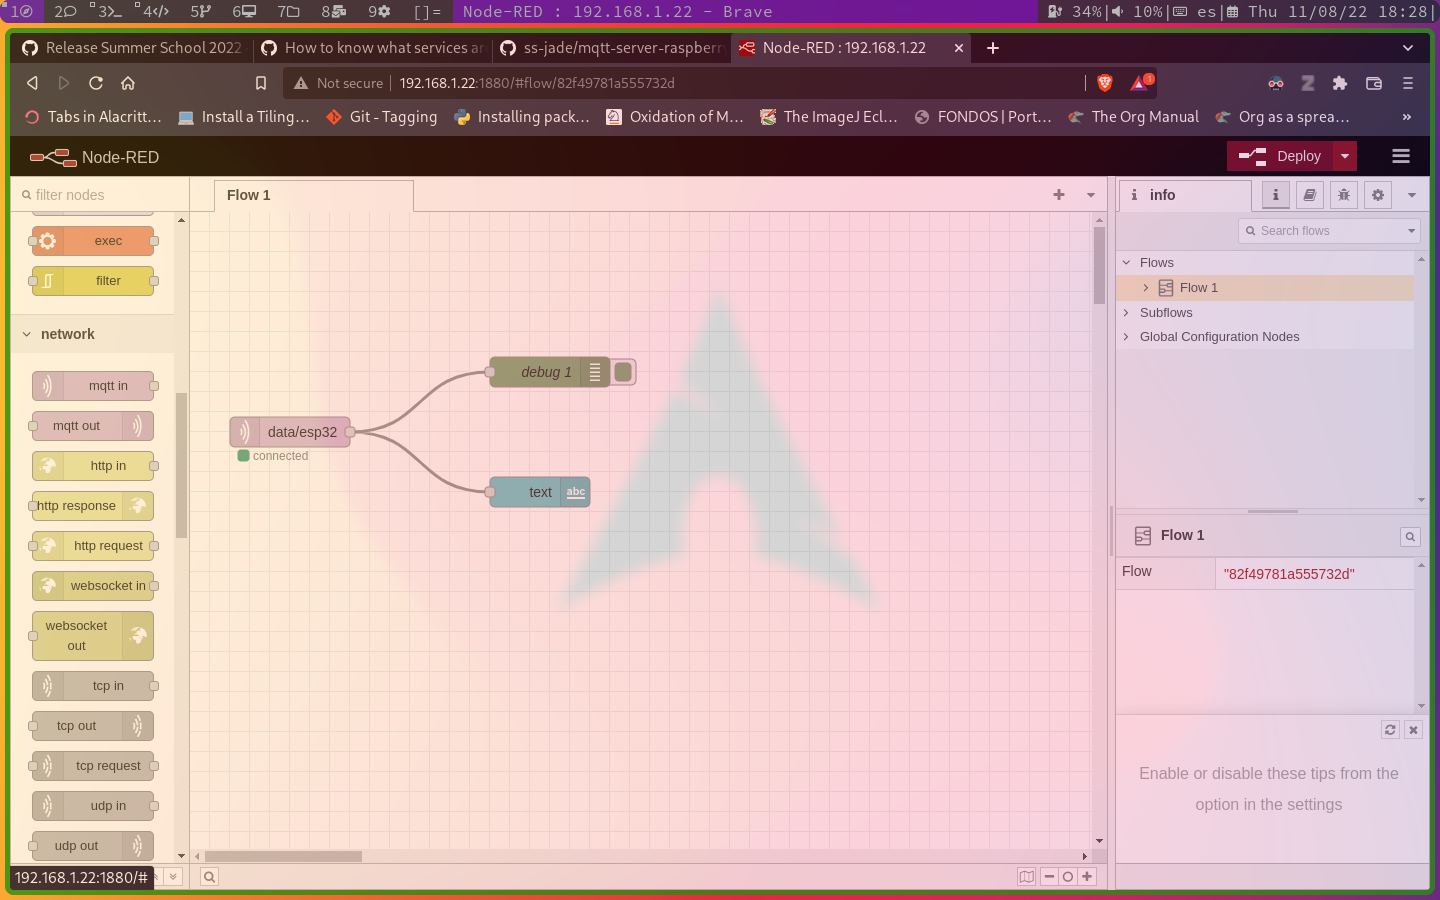
 Next, connect the blocks as shows in the image and click on the
 Deploy button to check if the process can connect to the Broker:
Creating the UI
Next, make double-click on the dashboard-text node and add a new Group by click on the pencil icon:
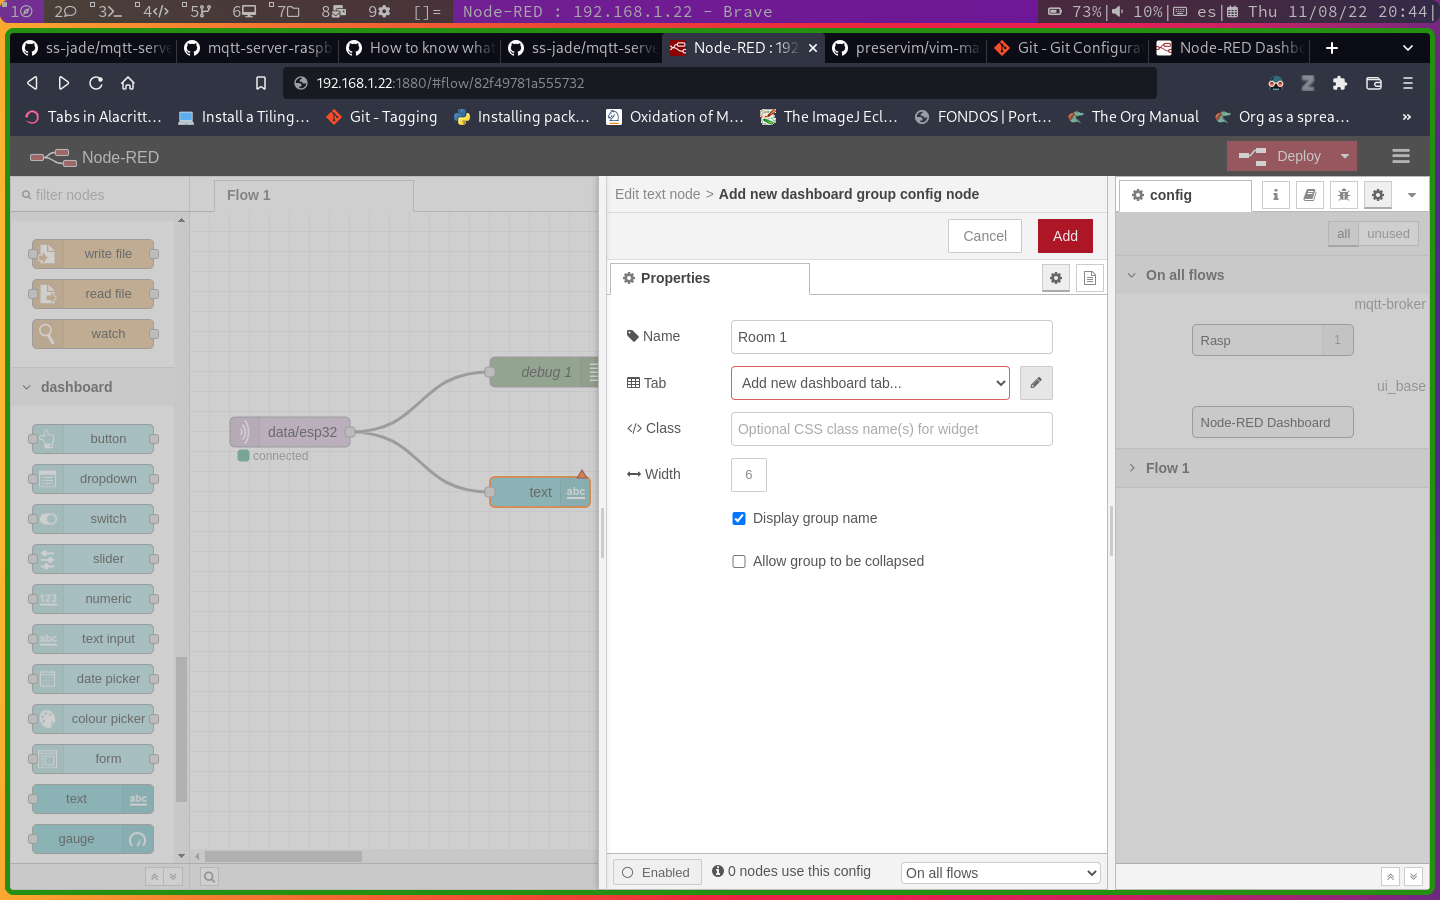
set the name Project, and add also a new Dashboard tab, do not change the default names:
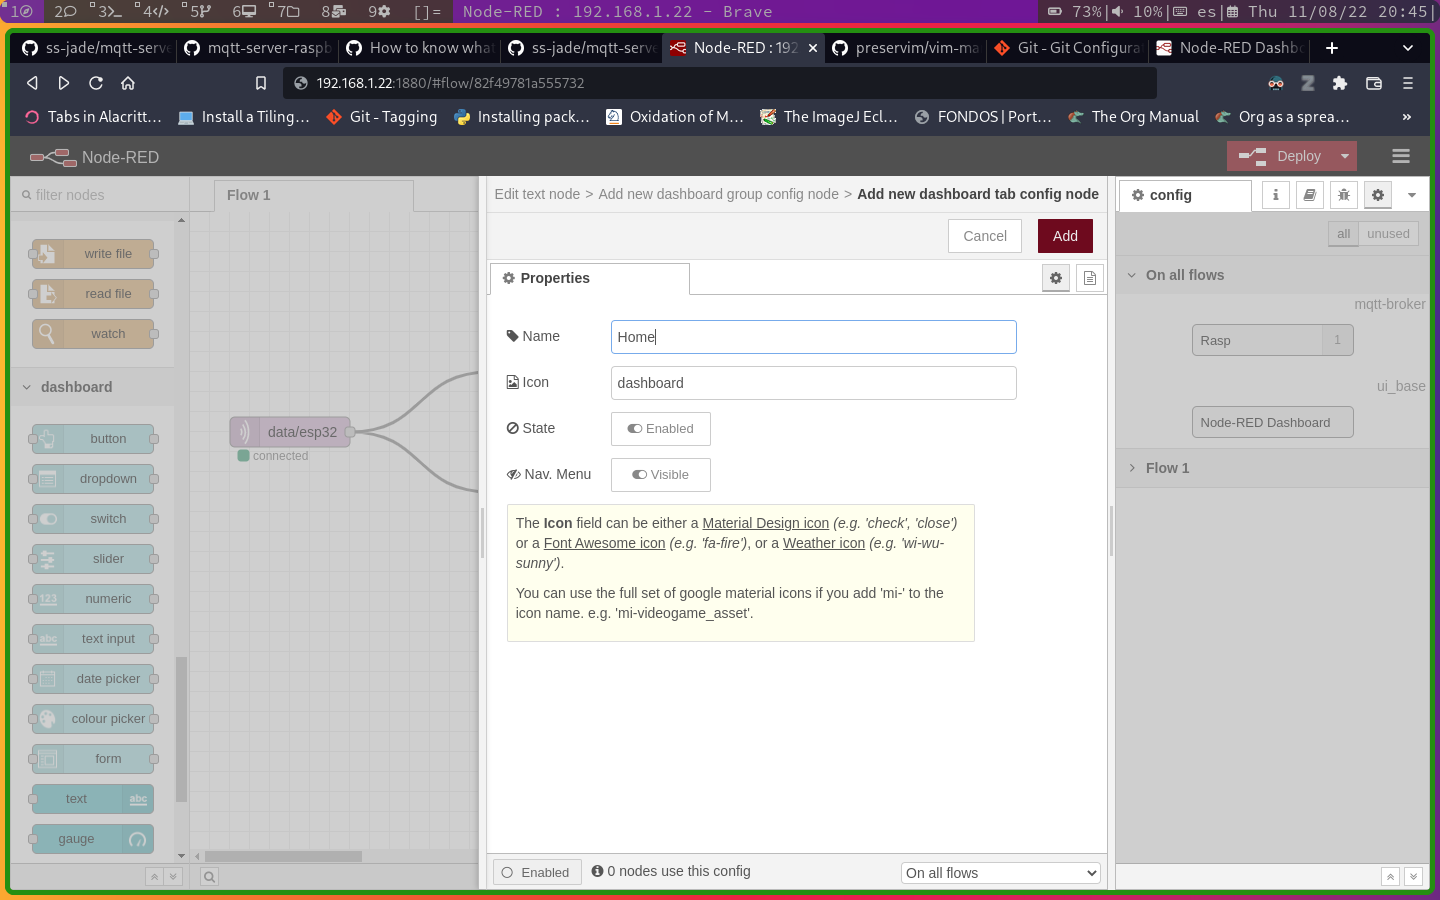
once the parameters have been configured click the add button twice; for the tabs and for the node properties. Next, click on the Deploy button and visit the hostname-or-ip/ui to see the output generated by the MQTT client:
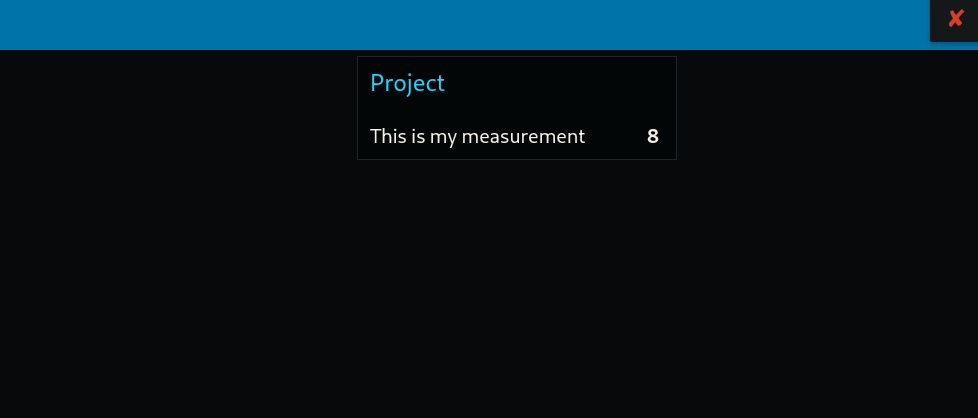
Note: you can also check the generated data on the Arduino IDE serial tools.