 Gerardo Marx Chávez-Campos
c641f35fd7
Gerardo Marx Chávez-Campos
c641f35fd7
|
3 years ago | |
|---|---|---|
| Imagenes | 4 years ago | |
| README.md | 3 years ago | |
| add-broker.png | 3 years ago | |
| deploy.png | 3 years ago | |
| flows.json | 3 years ago | |
| mosquitto.conf | 3 years ago | |
| mqtt-node.png | 3 years ago | |
| topic.png | 3 years ago | |
README.md
Introduction
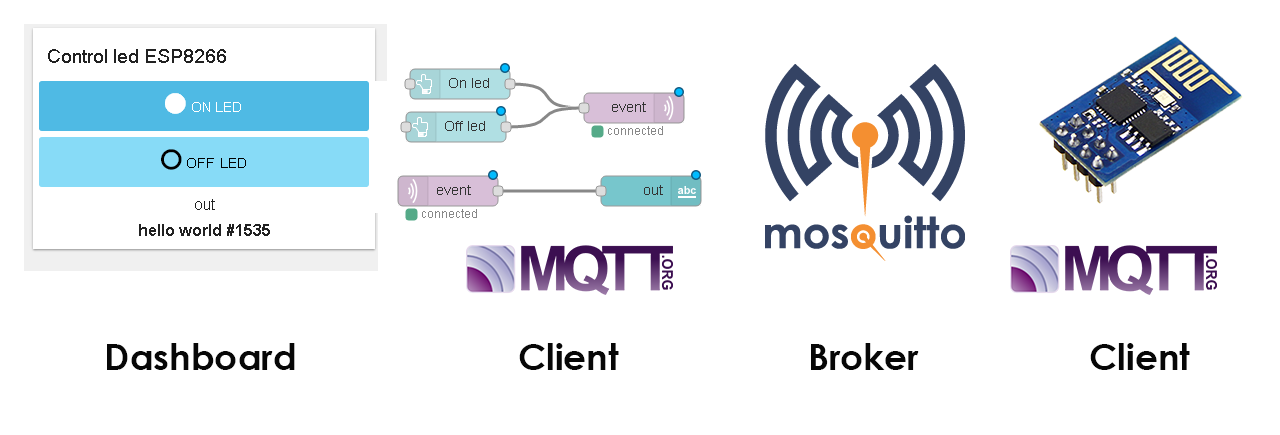
This reposity includes the basic information to mount a web server using Node-RED as a Dashboard and also working as a MQTT server using Mosquitto.
Again, thanks to Andrés Perez for the first version.
Servidor Web y comunicación con ESP32 por medio de un broker MQTT
En este repositorio se presenta el proceso para montar un servidor web haciendo uso de Node-RED, y llevar a cabo su conexion con una tarjeta ESP32, haciendo uso del protocolo de comunicacion MQTT.
Comunicacion
-
La comunicacion comienza en el ESP32, el cual se encarga de enviar un texto al broker MQTT por medio de una conexion de red local.
-
El broker MQTT recibe el valor y permite que otros clientes lo lean a traves de el.
-
Un servidor web ejecutado por Node-RED lee el dato recibido por el broker y ejecuta una accion de acuerdo al dato leido, en este caso esa accion es mostrar el texto en un sitio web.
Este proyecto trabaja en conjunto con un programa creado para el esp32, el cual se encuentra en el siguiente repostorio:
http://gmarxcc.com:8088/andrespm/mqtt-server-esp32.git
MQTT Server
Installing Mosquitto
For the Raspberry pi, based on Debian's distribution, we can use:
sudo apt update
sudo apt upgrade
sudo apt install mosquitto
To execute mosquitto and enable every time the system starts:
sudo systemctl enable mosquitto.service
Configuring the Mosquitto server
First replace the default configuration file by the file providing in this repository:
sudo cp ./mosquitto.conf /etc/mosquitto/mosquitto.conf
then, create the password file instanced on the mosquitto.conf file
sudo touch /etc/mosquitto/passwd
finally, restart the service:
sudo systemctl restart mosquitto
Node-RED installation
To install nodejs write in terminal:
sudo apt update
sudo apt install nodejs
sudo apt install npm
Then, let us install the Node-RED app and the Dashboard complement by using the Node Package Manager:
npm install node-red
npm install node-red-dashboard
now, we require to run in background the app and verify that node-RED is running:
node-red &
sudo netstat -plnt
then, to get access to node-RED go to your web browser at rasp-hostname.local:1880 or rasp-ip:18080.
A flow process in Node-RED
A basic process is implemented on Node-RED to test the mqtt protocol. Thus, add the next blocks:
mqtt infrom network groupdebugfrom commontextfrom dashboard
then, double-click on mqtt-in to open and edit the node:

click on Add new mqtt-brocker, then, in the Connection tab: set Name to Rasp, point the server to the raspberry's ip or hostname and port 1883. Leave unchanged the Security and Message tabs and click on the Add button.

Finally, set the topic to data/esp32 and the output to a String in the mqtt properties' node:
 Next, click on the
 Deploy button to check if the process can connect to the Broker:

how to connect???
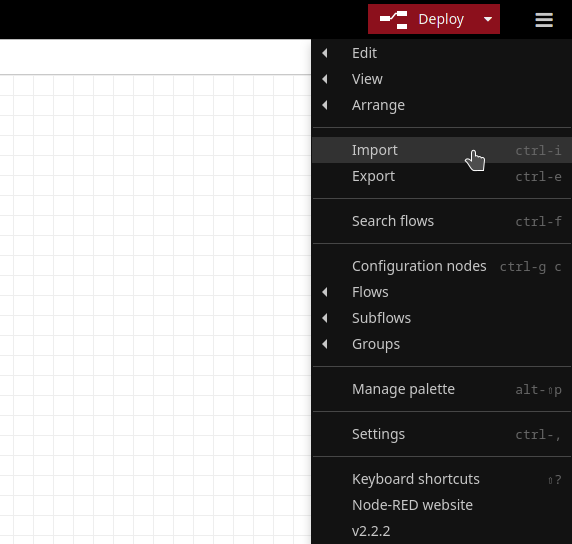
In the Node-RED App press the importbutton at the right-lower menu and upload the flows.json file in this repository.
Damos clic en el nodo de mqtt in (el morado con el texto prueba/xd), se desplegara un menu con las propiedades del nodo.
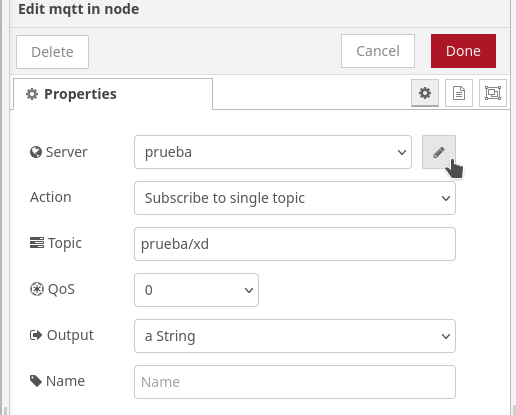
Damos clic en el lapiz, el cual nos desplegara un menu con la configuracion, en el apartado de server tecleamos la direccion de nuestro server mosquitto
Una vez configurado, corremos el proceso con boton Deploy, en caso de haber configurado correctamente el nodo mqtt, debajo de este habra un mensaje con el texto connected
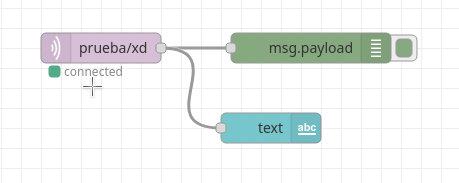
Como se puede apreciar, uno de los nodos es una salida de insterfaz de usuario de tipo texto. Para acceder a ella nos dirijimos al navegador y escribimos la siguiente direccion: localhost:1880/ui
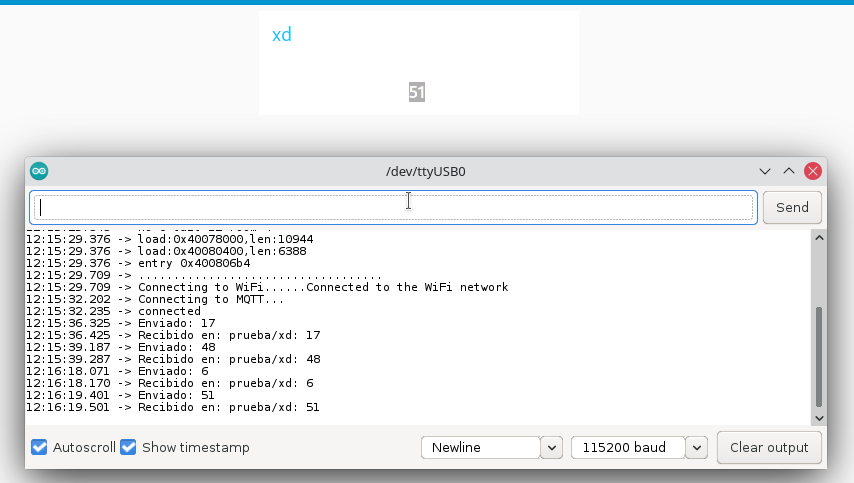
En esta interfaz se reciben los datos enviados por otros clientes al servidor mqtt
Recepcion de datos en DASHBOARD
Al entrar a la pagina del dashboard vemos como node-red recibe el dato y lo muestra en la interfaz de usuario