3.8 KiB
Testing the ESP32 and Arduino IDE
Introduction
This repository shows the basic usage of the Arduino IDE with the ESP32 development board by implementing a blinking LED and serial communication.
Programming the ESP32 Board
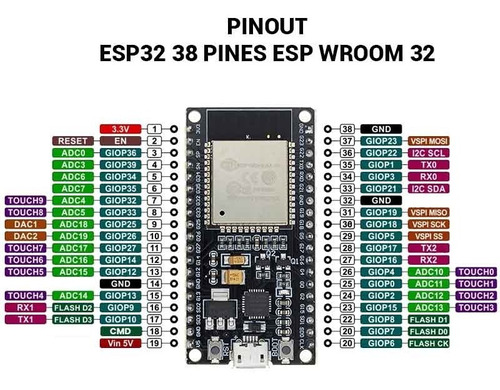
For this example course, we are going to use the ESP32-S WROOM, please check what board you are using.

then, we need to install the Arduino IDE to program the ESP32.
Installing the Arduino IDE
The Arduino IDE can be installed on Windows, MacOS, or GNU Linux, the Windows and MacOS installation is commonly using the installer. In the case of the GNU Linux it is highly recommended to use the distribution's package manger. In my case, the ArchLinux manager is pacman, thus use:
sudo pacman -Sy arduino
[sudo] password for gmarx:
:: Synchronizing package databases...
 core                                 157.9 KiB   235 KiB/s 00:01 [####################################] 100%
 extra                               1710.6 KiB  3.66 MiB/s 00:00 [####################################] 100%
 community                              6.7 MiB  7.49 MiB/s 00:01 [####################################] 100%
warning: arduino-1:1.8.19-1 is up to date -- reinstalling
resolving dependencies...
looking for conflicting packages...

Packages (1) arduino-1:1.8.19-1

Total Installed Size:  59.36 MiB
Net Upgrade Size:       0.00 MiB

:: Proceed with installation? [Y/n]
Note: The Arduino IDE requires Java jdk8 and jre8 installed on the OS.
Note: You can install a Dark theme by following these instructions
Adding the ESP32 Boards
The addition of the ESP32 boards requires to include a URL to download a Board Manager by clicking on File -> Preferences and pasting the URL https://dl.espressif.com/dl/package_esp32_index.json in the field Additional Boards Manager URLs:
https://dl.espressif.com/dl/package_esp32_index.json
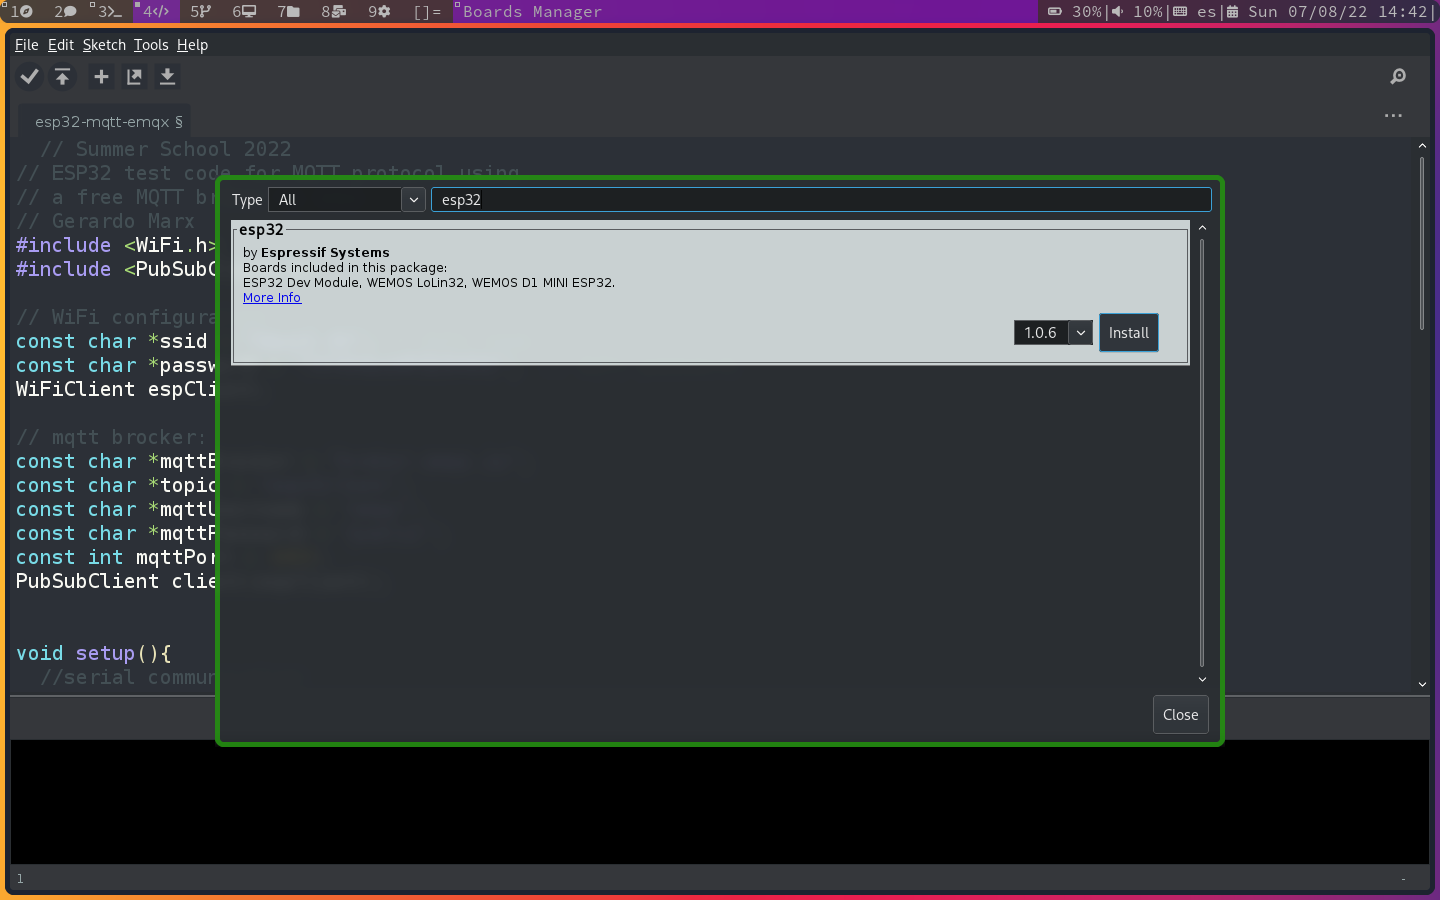
Next, we can install the ESP32 board on Arduino IDE by Tools -> Board -> Boards Manager ..., and writte ESP32 to install the tools required to work with:
Sample code to test ESP32
Before start programming the ESP32 board we have to select the proper board in the Board tool. Thus, again open and select the Tools -> Bord -> DOIT ESP32 DEVKIT V1. Then, paste the next code segtion to test the ESP32 board; the code is also the blinking-serial.inofile:
  /*
 *
 * Example code for ESP32-S:
 * The code blinks the onboard LED (at D2 in GPIO 02) every 0.500 seconds.
 * The code also prints by serial communcation the word "Hello" during the
 * ON stage of the LED, and then prints "World" during the OFF.
 * Gerardo Marx 19/Jul/2022
 */

// this variable is defined in pins_arduino.h for DOIT ESP32 DEVKIT V1
// int LED_BUILTIN = 02;
int LED_ONBOARD = 02;

void setup() {
  // put your setup code here, to run once:
  pinMode(LED_BUILTIN, OUTPUT);
  //serial  monitor setup
  Serial.begin(115200);
      }

void loop() {
  // put your main code here, to run repeatedly:
  Serial.print("ON");
  digitalWrite(LED_BUILTIN, HIGH);
  delay(500);
  // after delay
  Serial.print(" - OFF\n");
  digitalWrite(LED_BUILTIN, LOW);
  delay(500);
next, press Crt-u to compile and upload the code generated into the board.
The error no module named serial
If you get an error like this:
ModuleNotFoundError: No module named 'serial'
exit status 1
Error compiling for board DOIT ESP32 DEVKIT V1.
then, it is necessary to install in python:
pip3 install pyserial
and must probably you will requiere pip3 python package manager:
sudo pacman -Sy python-pip
Permission denied: '/dev/ttyUSB0'
ls -l /dev/ttyUSB0
crw-rw---- 1 root uucp 188, 0 Aug  7 14:50 /dev/ttyUSB0
sudo usermod -a -G uucp $USER
groups
libvirt uucp gmarx
Note: you need to relogin into you session.


